


Secret Recipe #1: Crispy Mooncakes
- Diana Zhang
- Sep 15, 2020
- 4 min read
Makes about 20 mooncakes
Background

Mooncakes are extremely essential for an annual Chinese holiday: the Mid-Autumn Festival. It is held on the 15th day of the 8th month on the Lunar Calendar, which is around mid-September to early October for the modern calendar. Families in China gather together and remark on the full moon while enjoying these sweet desserts.
But where did the idea of mooncakes come from?
The famous dessert originated from the Zhou Dynasty (1045-221 BC). During this time, ancient emperors praised the moon and its goddess for harvests of the following year using these scrumptious desserts. The ritual then grew more popular in the Tang Dynasty (618-907) among the upper classes and slowly spread to the lower classes as well. However, this tradition did not become a proper festival until the Song Dynasty (960-1279); the mooncakes were not eaten by people until the Yuan Dynasty (1279-1368). At its peak of popularity in the Ming and Qing Dynasties (1368-1912), the Mid-Autumn Festival was just as favorable as the Chinese New Year. The people celebrated it by performing the fire dragon dance and reciting poetry. Currently, many old-fashioned activities have disappeared from the festival, but it is now a national holiday for the people of China to celebrate by tasting mooncakes and watching the Mid-Autumn Festival Gala on TV at night.
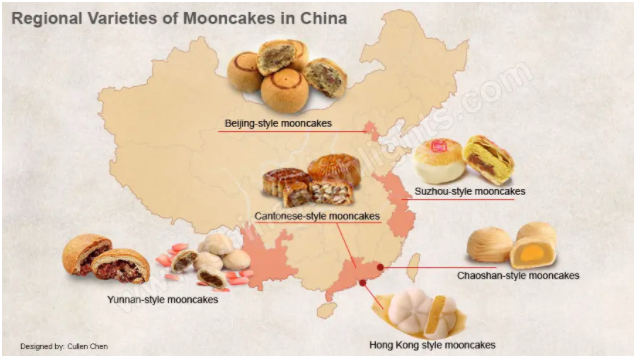
There are various kinds of mooncakes in mainland China, but the most notable ones include the Cantonese style mooncake, which is soft and creamy; and flaky layered mooncakes, which is what we are going to make. These mooncakes are more commonly found in Suzhou, China, which is west of Shanghai. Their appearance may not be as elegant as Cantonese mooncakes, yet their flavor is magnificent nevertheless.
Ingredients
200g of all-purpose flour
20g of Sugar
60g of Lard
95 ml of water
2g of salt
180g of Flour
100g Lard
A bag of red date paste (454g/16 oz)
A small bag of walnuts
Bread Machine/Kitchen Mixer
Cling Wrap
Rolling pin
Pastry Mat
Blue Highlight for Dough, Purple for Oil Crisp Dough, Pink for fillings
Preparation
The Dough
Add the flour, sugar, lard, salt, and water into a mixing bowl
- Do not add the full amount of water at first, save a little to add in while mixing
Use your kitchen mixer to combine the materials until it appears in a dough shape
Take dough out from the mixer and knead by hand, then use kitchen mixer to mix for another 4 mins
If your kitchen mixer is not steep enough, it is best to use a bread machine
Move the dough into the bread machine and set for 20 mins of stirring
You can always substitute a bread machine with a kitchen mixer
To test the readiness of the dough, remove a small piece of dough and stretch it.
If the stretched dough seems thin but does not break, then you are ready for the next step
Wrap dough in cling wrap. Set it aside on the pastry mat to rest for 20 mins
The Oil Crisp Dough
Add lard and flour into the bread machine. Mix for 5 mins.
Make sure to scrape off the flour into the center
Use your hands to knead the crumbs into shape.
Wrap this dough in cling wrap and set it aside.
The Fillings
Mix the walnuts and the red date paste until evenly combined
Shape the compound into 2 cylinders
Plastic Wrap the cylinders to prevent drying
The Combination of Doughs
Cut the dough in half and plastic wrap the one piece
Repeat step 1 with the oil crisp dough
Use the dough to wrap the oil crisp dough
Mold it into a sphere, then crush it into a thick circle
Use the rolling bin to roll the dough up and down into a thin, rectangular shape.
Fold the lower edge on to the center, then use the upper edge to cover the lower edge like so
Repeat step 5
Curl the flat pastry sheet into a cylinder
Repeat the process with the remaining dough
Cut each cylinder into 8 pieces (large) or 12 pieces (small).
Shape each roll into spheres and cover them with plastic wrap
Divide the fillings into 19 small rolls. Cover them with cling wrap as well.
The Merge
Roll the divided dough into flat circles. Be careful to not put pressure on the edges of the dough.
Put a filling truffle in the center
Wrap the dough around the filling using the space between your thumb and your index finger from bottom to top
After fully wrapped with a tip at the center, place the mooncakes on the pastry mat and roll them into smooth, thick circles.
Repeat steps 1-4 for all rolls and fillings
The Baking
Bake for 20 mins at 190°C (375 degrees°F)
Let them cool off after so you can enjoy a sweeter taste
Commentaries
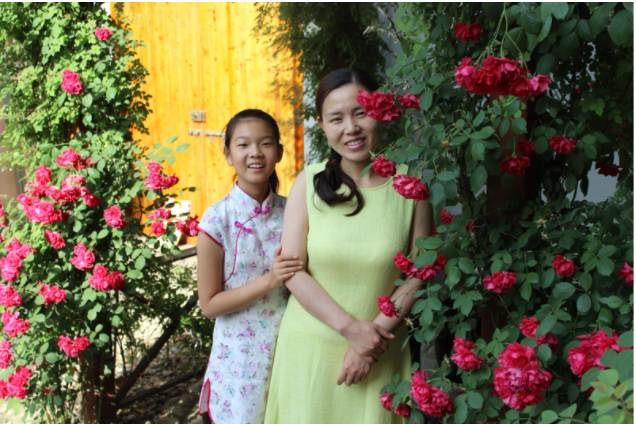
I went to a culinary baking school as a hobby 4 years ago in China. Out of all the mooncakes I was instructed to create, the most unique kind was the crispy mooncake. Its texture is not as buttery as the common Cantonese mooncake, but its peculiar appearance and flaky skin interested me. After graduating from the program, I started to bake Chinese pastries in my freetime and for holidays. Consequently, baking crispy mooncakes became an annual event in the family. I hereby share this recipe with you; hopefully you can extend this baking invitation to your family and have some family fun!
- Diana’s Mom
Hi guys! This is Diana Zhang, the Editor in Chief for Dear Asian Youth and the author of this recipe. On August 28th, my mother had some free time to make these delicious mooncakes, which sparked the idea of creating the "Secret Recipe" section for our literature website. Its main purpose is to introduce the diverse foods and culture of the Asian Community. I hope that this article will not be the only appetizing recipe on the website, so please feel free to email me or reach out on slack if you are interested in publishing a flavorful, authentic recipe! Lastly, happy baking!
- Diana Zhang
- Email: ziyizhangdiana1108@gmail.com
Comments